Computer Repair Services
Genius CPR stores acquire quality spare parts for computer repairs.
Genius CPR is one of the most reliable and professional computer repair stores. Our highly trained and certified computer repair technicians can repair and service all computers components of any kind.
Laptop
Desktop
Technical Guide
- Replacing a laptop battery
- Upgrading laptop RAM
- Replacing a laptop hard drive or SSD
- Cleaning laptop fans and air vents
- Replacing a laptop keyboard
- Replacing a laptop screen
- Replacing a laptop's Wi-Fi card
- Reapplying thermal paste to a laptop CPU
Replacing a laptop battery
-
- Power off the laptop and disconnect the power adapter.
-
- Locate the battery release latch or screws on the bottom of the laptop.
-
- Slide the latch or remove the screws to release the battery.
-
- Insert the new battery, ensuring it’s aligned correctly.
- Reattach the latch or screws and reconnect the power adapter.
Upgrading laptop RAM
- Power off the laptop and disconnect the power adapter.
- Locate the RAM access panel on the bottom of the laptop.
- Remove the screws securing the panel and open it.
- Gently push the tabs on either side of the RAM module to release it.
- Align the new RAM module with the slot and gently push it down until it clicks into place.
- Replace the access panel and screws.
Replacing a laptop hard drive or SSD
- Power off the laptop and disconnect the power adapter.
- Locate the hard drive or SSD access panel on the bottom of the laptop.
- Remove the screws securing the panel and open it.
- Disconnect the hard drive or SSD from the connector or remove it from the mounting bracket.
- Install the new hard drive or SSD by connecting it to the connector or placing it in the mounting bracket.
- Replace the access panel and screws.
Cleaning laptop fans and air vents
- Power off the laptop and disconnect the power adapter.
- Locate the fan and air vent access panel on the bottom of the laptop.
- Remove the screws securing the panel and open it.
- Use compressed air to blow out dust and debris from the fans and air vents.
- Replace the access panel and screws.
Replacing a laptop keyboard
- Power off the laptop and disconnect the power adapter.
- Remove the screws securing the keyboard from the bottom of the laptop.
- Gently pry up the keyboard, being careful not to damage the ribbon cable connecting it to the motherboard.
- Disconnect the ribbon cable and remove the old keyboard.
- Connect the ribbon cable to the new keyboard and place it in position.
- Replace the screws to secure the keyboard.
Replacing a laptop screen
- Power off the laptop and disconnect the power adapter.
- Remove the screws securing the screen bezel and gently pry it off.
- Remove the screws securing the screen to the laptop frame.
- Gently tilt the screen forward and disconnect the video cable.
- Connect the video cable to the new screen and place it in position.
- Replace the screws to secure the screen and reattach the bezel.
Replacing a laptop’s Wi-Fi card
- Power off the laptop and disconnect the power adapter.
- Locate the Wi-Fi card access panel on the bottom of the laptop.
- Remove the screws securing the panel and open it.
- Disconnect the antenna cables from the Wi-Fi card.
- Remove the screw securing the Wi-Fi card and gently slide it out of the slot.
- Insert the new Wi-Fi card into the slot and secure it with the screw.
- Reconnect the antenna cables and replace the access panel and screws.
Reapplying thermal paste to a laptop CPU
- Power off the laptop and disconnect the power adapter.
- Locate the CPU access panel on the bottom of the laptop.
- Remove the screws securing the panel and open it.
- Remove the screws securing the CPU heatsink and fan assembly.
- Gently lift the heatsink and fan assembly off the CPU.
- Clean the old thermal paste from the CPU and heatsink using isopropyl alcohol and a lint-free cloth.
- Apply a pea-sized amount of new thermal paste to the center of the CPU.
- Reattach the heatsink and fan assembly, ensuring even pressure is applied.
- Replace the screws to secure the heatsink and fan assembly, and replace the access panel and screws.
- Laptop won't turn on
- Laptop is overheating
- Laptop has slow performance
- Laptop has Wi-Fi connectivity issues
- Laptop has no sound
- Laptop has a black or blank screen
- Laptop's keyboard or touchpad is not working
- Laptop's battery drains quickly
- Backing up your Data
- Windows Default Programs
- Change Search Engine
- Optimal Sleep Timers
- Installing Anti-Virus
- Setting up Webcam
- Wireless Printer Setup
- Configuring E-mail
Laptop won’t turn on
- Check if the power adapter is connected and the power outlet is working.
- Try a different power adapter if available.
- Perform a hard reset by removing the battery and power adapter, then holding the power button for 30 seconds.
- Check if the battery is charged or try a different battery if available.
Laptop is overheating
- Ensure the laptop is on a flat, hard surface to allow proper airflow.
- Clean the air vents and fans to remove dust and debris.
- Update the BIOS and drivers to the latest version.
- Use a cooling pad or external fan to help dissipate heat.
Laptop has slow performance
- Close unnecessary programs and browser tabs.
- Run a disk cleanup and defragmentation.
- Update the operating system and drivers.
- Scan for malware and viruses using a reputable antivirus software.
- Consider upgrading the RAM or storage.
Laptop has Wi-Fi connectivity issues
- Restart the laptop and router/modem.
- Check if other devices can connect to the Wi-Fi network.
- Update the Wi-Fi driver.
- Reset the network settings.
- Move closer to the router or use a Wi-Fi extender.
Laptop has no sound
- Check if the volume is muted or set too low.
- Update the audio driver.
- Run the audio troubleshooter in the operating system.
- Check if external speakers or headphones are connected properly.
Laptop has a black or blank screen
- Check if the laptop is in sleep or hibernation mode and wake it up.
- Adjust the screen brightness.
- Connect an external monitor to check if the issue is with the laptop’s display.
- Update the graphics driver.
- Perform a hard reset.
Laptop’s keyboard or touchpad is not working
- Restart the laptop.
- Check if the keyboard or touchpad is disabled in the settings.
- Update the keyboard and touchpad drivers.
- Clean the keyboard and touchpad surface.
- Connect an external keyboard or mouse to check if the issue is with the laptop’s built-in
Laptop’s battery drains quickly
- Adjust the power settings to a more energy-efficient mode.
- Close unnecessary programs and browser tabs.
- Decrease the screen brightness.
- Disconnect peripherals when not in use.
- Check the battery health and consider replacing it if it’s degraded.
Backing up your Data
Data is the most crucial part of our lives. In contrast to our cell phones, we store more files and larger files on our computers. Backing up this data can seem like a daunting task because of the sheer amount of data. Additionally, the files are stored in several locations on a computer and can be difficult to locate and back up. There are several programs out there that can help you backup your data as well as the built-in Windows feature called File History. File History is a great way to keep you data safe from accidental deletion because it allows you to go back and retrieve files. Further, it can be set to a schedule such as daily backups that run in the background. Apple’s macOS computers have a similar program to Microsoft Windows’ File History called Time Machine.
Most backups should not be to the computer itself, therefore both Time Machine and File History enforce that the files are backed up to another drive, such as an external USB drive. There are many other options available for backing up files and some programs that offer encryption for extra security. Always make sure the program is developed by a reputable company, is easy to use, and has the features that you need for your computer.
Windows Default Programs
When a person clicks on a file, Windows executes the default program set to open that file. When you install a program, part of the program’s setup is to inform the computer which extensions the program is capable of utilizing. For example, Microsoft Excel files are saved as .xls or .xlsx and when someone opens those file extensions, Windows knows to use Excel to open that file. If you download OpenOffice or any other program with compatibility for .xls file types, then you can set Windows to use another program to open those files instead.
Setting your default programs is important to getting functionality out of your computer. To set these default programs in Windows 11, go to Settings, then click on Apps, and finally click on Default Apps. You can manually set certain extensions’ default program on the computer as well as click on specific programs and set their commonly used extensions. On computers with a previous version of Windows, these settings are in the Start Menu or the Control Panel under Default Programs.
Change Search Engine
The default search engine is what your computer’s web browser uses when searching keywords or terms. The computer uses this search engine automatically and will display the results on the search engine’s search result page. By default, the Microsoft Edge search engine is Bing and Google Chrome’s search engine is Google. But if you have a preference such as DuckDuckGo, Ask Jeeves, Yahoo, or Dogpile, then you will have to set the default search engine manually for your web browser. To do this, go into the settings on the web browser.
Computers use web browsers such as Google Chrome, Microsoft Edge, and Firefox to access the internet and each have a similar path to find and set the default search engine. Usually you start with the ‘…’ which is an indicator for a menu, and then you choose Settings. From there, keep in mind that each browser will navigate slightly differently, you will be looking for Search Preferences or Search Engine. Once you locate the correct settings page, then you can remove the current default search engine and add your own.
Optimal Sleep Timers
Standby mode, hibernate, and sleep mode are all ways that your computer handles being idle. These modes reduce power consumption and strain on the computer’s internal components. It’s important to set these modes up properly though to prevent frustration when reading a website, article, or digital book. For example, if the setting is too low such as 1 minute before the monitor goes to sleep then the display will turn off abruptly while you are still trying to use it.
A sleep timer such as 10 minutes is better suited for most people because within the 10 minutes an action will occur which resets the sleep timer. For hard disk or computer standby timers, it is recommended to set it to no less than 30 minutes, and optimally set it for an hour. When a hard disk or computer is put to sleep, it takes much longer to resume than a display going to sleep. Rarely should someone set the sleep timer to “Never” because then the computer will just run non-stop. The downside is wear and tear on the internal components and the monitor or display. Monitors and displays will start to have ghost imaging or coloration defects from being on for too long. Additionally, computers can consume quite a bit of power if left on and for businesses that could mean 5, 10, or maybe 100 computers consuming power for no reason.
Installing Anti-Virus
To keep a computer running well, and to prevent data loss and other consequences of having a virus, it is recommended to be proactive with a legitimate subscription-based anti-virus software product such as Malwarebytes Premium. The built-in Windows Defender will catch some malware, but it should not be relied on. Similarly, for Apple macOS computers, there is no built-in anti-virus security. Contrary to popular belief, macOS computers can get viruses, browser hijackers, and unwanted programs.
There’s two concepts to anti-virus protection that are important: real-time protection which blocks incoming threats before they get a chance to install to your computer, and routine scanning both on-demand and scheduled. Malwarebytes Premium offers both aspects and more. Genius CPR is partnered with Malwarebytes to bring virus protection and peace of mind to all its customers. Make sure you download Malwarebytes from the company’s website and nowhere else, and make sure you sign up for Premium. The free version does not provide real-time protection and is only good to delete the virus once it is already installed. Viruses cause changes to the computer that cannot be reverted simply by deleting the virus. Those changes must be reverted manually, and you may not know what it changed until it is too late.
Setting up Webcam
Having a computer with a webcam is essential for calling and meeting services such as Skype, Zoom, Microsoft Teams, GoTo Meeting, WebEx, and Google Meet. Webcams will generally have a built-in microphone for audio and t least a 720p camera for video. Setting up a webcam can require some work, however. Optimal webcam location is important so that participants are not subjected to awkward angles from the webcam being too low, too high, or from the side. For a desktop or laptop computer, webcam placement is easily accomplished by affixing the webcam to the top of the screen in front of you. It should be the proper height and direction if affixed to the top of the screen. Distance from the user will also be optimal for sound, video frame, resolution, and clarity.
Once the webcam is positioned well, then it needs to be plugged into the USB port on the computer. If the computer is connected to the internet, the webcam may automatically install the necessary drivers and support software. If it does not, then it may have come with a disk or diskette for your computer to install the drivers and support software. Many companies are going with web-based support and drivers instead of a diskette, so the last resort is the webcam manufacturer’s website for drivers and support software. Once the software is downloaded and installed, it is recommended to give the computer a restart to ensure the camera software is working properly. Then the camera should work for calls and meetings as well as picture-taking and video recording. Many laptop computers have a built-in webcam, but if that camera should fail you can always purchase a stand-alone webcam to supplant the built-in one.
Wireless Printer Setup
Wireless printers need setup on your wireless network before they will communicate and print. Their setup is easier if the printer has an LCD panel to navigate the software and access the network settings. Once you see the list of nearby wireless networks, select the wireless network that your computer uses. If it is an encrypted network, then it will prompt for password, otherwise unencrypted networks will connect right away.
Very few printers require a computer to setup a wireless printer anymore. If your printer is dated and does not have an interface, then you will use software on your computer to configure the printer while it is connected to the computer via USB. Once configured, it will retain the settings programmed into it from the computer using the setup program that came with the printer, usually on a disc. After the printer is configured either manually through the computer, or with the LCD interface on the printer, then the computer will need to download and install the proper driver and support software to print to the printer. In Windows, you go to the Settings or Control Panel to Add a Printer or Add Hardware, and as long as your computer is on the same network as the printer then select the printer from the list. If Windows can locate the driver software automatically online, then it will be fairly autonomous, but if it fails then you will need to seek the driver and software package from the printer manufacturer’s website. Additionally, if you plan to scan documents from the printer to your computer then it is recommended to go to the manufacturer’s website and get the full feature download else those functions may not be available.
Configuring E-mail
Whether you use Outlook, Windows Mail app, Mozilla Thunderbird, or any other mail application, the setup for e-mail can be very frustrating.
The best thing to do is to have your passwords at the ready, because whichever e-mail program you choose will need your account and password information. If you use one of the mainstream e-mail companies such as Yahoo, Google, Hotmail, or iCloud, then the setup is generally easier because those companies work out easy sign-in modules which preconfigure the account on your device.
Otherwise, if you have your own domain or a company e-mail account then the domain hosting company such as GoDaddy, Bluehost, InMotion, or Dreamhost will have ports and DNS/IP addresses to use that are specific to their service. When setting up Outlook, a facet of the Microsoft Suite 365, many setting must be configured such as the inbound and outbound address, port numbers, security and encryption method, and the username and password. The good news is that when the setup of your e-mail is complete, rarely does it need to be adjusted. The computer will hold the settings in the mail application of choice and e-mails will then continue to flow into your inbox.
Troubleshoot
- Laptop won't turn on
- Laptop is overheating
- Laptop has slow performance
- Laptop has Wi-Fi connectivity issues
- Laptop has no sound
- Laptop has a black or blank screen
- Laptop's keyboard or touchpad is not working
- Laptop's battery drains quickly
Laptop won’t turn on
- Check if the power adapter is connected and the power outlet is working.
- Try a different power adapter if available.
- Perform a hard reset by removing the battery and power adapter, then holding the power button for 30 seconds.
- Check if the battery is charged or try a different battery if available.
Laptop is overheating
- Ensure the laptop is on a flat, hard surface to allow proper airflow.
- Clean the air vents and fans to remove dust and debris.
- Update the BIOS and drivers to the latest version.
- Use a cooling pad or external fan to help dissipate heat.
Laptop has slow performance
- Close unnecessary programs and browser tabs.
- Run a disk cleanup and defragmentation.
- Update the operating system and drivers.
- Scan for malware and viruses using a reputable antivirus software.
- Consider upgrading the RAM or storage.
Laptop has Wi-Fi connectivity issues
- Restart the laptop and router/modem.
- Check if other devices can connect to the Wi-Fi network.
- Update the Wi-Fi driver.
- Reset the network settings.
- Move closer to the router or use a Wi-Fi extender.
Laptop has no sound
- Check if the volume is muted or set too low.
- Update the audio driver.
- Run the audio troubleshooter in the operating system.
- Check if external speakers or headphones are connected properly.
Laptop has a black or blank screen
- Check if the laptop is in sleep or hibernation mode and wake it up.
- Adjust the screen brightness.
- Connect an external monitor to check if the issue is with the laptop’s display.
- Update the graphics driver.
- Perform a hard reset.
Laptop’s keyboard or touchpad is not working
- Restart the laptop.
- Check if the keyboard or touchpad is disabled in the settings.
- Update the keyboard and touchpad drivers.
- Clean the keyboard and touchpad surface.
- Connect an external keyboard or mouse to check if the issue is with the laptop’s built-in
Laptop’s battery drains quickly
- Adjust the power settings to a more energy-efficient mode.
- Close unnecessary programs and browser tabs.
- Decrease the screen brightness.
- Disconnect peripherals when not in use.
- Check the battery health and consider replacing it if it’s degraded.
- Coloration or Lines in the Screen
- Slowness and Freezing
- Crashes and Blue Screens
- Programs Not Working
- Getting Hot, Overheating
- No Video, Blank Screen
- Lost Wi-Fi, No Internet Connection
- Brightness Not Working or a Dim Screen
Coloration or Lines in the Screen
The biggest thing to notice is if there are any solid black blotches in the screen of the computer. Those blotches will be evidence of an impact point or pressure spot where something heavy has permanently damaged the computer screen. When these blotches appear, it is a bleed effect of the liquid crystal display. Next, inspect the screen for damages to the exterior which may give signs of an impact or accidental bump which may have caused the issue. If there are lines in the screen and the computer is a laptop, then move the screen on its hinges to see if the lines react.
Good news, if the lines react or possibly even disappear at certain points in the movement of the screen then it is a loose cable that needs to be fully seated back in the connector. Take it to a computer repair professional and have them reconnect or replace the loosened cable. Repairs like that should be quick and affordable. If the lines do not change at all, then it could still be a loose cable, but it is less likely. While the computer screen is on, try gently touching different parts of the screen and applying very gentle pressure to reveal more lines, coloration, or impact points anywhere in the screen. If the screen is completely dark and does not illuminate at all, then it is likely a dead computer screen which will need to be replaced.
Slowness and Freezing
Computers have a handful of reasons why they get slow and freeze up. Most notably, the age of a computer makes a big difference because the internal components are not meant to withstand the test of time forever. Commonly, the hard disk needs replaced and can be perpetrator in computers with ages ranging anywhere from 6 months to 10 years.
Traditional hard disk drives especially are susceptible to vibrational, thermal, or electrical damage over the course of time because of their magnetic and mechanical nature. When these drives being to fail, your computer can limp along and get progressively worse until it’s absolutely maddening. Other reasons for slowness and freezing are Windows-based errors, other software applications causing lockups, serious computer hardware failure such as processor failure or memory failure, and viruses or malware. Depending on the severity of the freezing and slowness, you may or may not be able to eliminate a few of the possibilities listed.
General rule of thumb is to try the least invasive and least destructive procedures first. Start with the application software loaded on the computer and see if one application seems to have more failures or freezes than others. By narrowing it down, you might be able to just uninstall that application from your computer to resolve the problem. If no particular application seems to be holding things up, then maybe a fresh install of the Windows or macOS operating system is the proper next step. Most Windows-based computers and all macOS computers have a recovery partition which can restore the computer to a factory condition. Be careful though, this will remove all the data from your computer. If this does not work, or you do not feel comfortable trouble shooting the issue then it is time to take it to a computer repair shop near you.
Crashes and Blue Screens
Blue screens, also known as the Blue Screen of Death (BSOD), are error screens which output error codes on the computer screen that may help in diagnosing the problem. Generally, blue screens are hardware-related but there are a few Windows-based errors that can occur on computers as well. Commonly referred to as crashes, these blue screens are very daunting to the average user. They can occur once and go away, if the error was a fluke, but repetitive blue screens will require some serious trouble shooting. These trouble shooting steps are for the tech savvy, so beware if you are not.
The first thing you will want to try is to remove or disconnect the battery. Taking all the power out of the computer can help remove the error stored in the memory. If that does not resolve it, then remove the memory from the computer and use only one stick of RAM at a time in each slot to find if either the RAM is bad or the slot for the RAM is bad. Beyond that, it could be a computer hard disk failure. When hard disk drives fail, they can cause all sorts of errors depending on which part of the computer’s hard disk has failed. Lastly, and very rarely, the computer’s processor could be faulty. Mostly, you would see the processor fail if it has been overclocked at any point in time or if the processor has an internal failure of some kind which makes it faulty. Processors are never the first culprit to rule out, but they can go bad. Some of the signs of a faulty processor are computer overheating, slowness, glitches, and blue screens or crashes.
Programs Not Working
If a particular program is not working, then the easiest thing to do is uninstall it, and then reinstall it. But if that does not solve the issue, then it could be a deeper problem with the operating system such as Windows or macOS. It could also be a sign of a virus or some malware making application force close as they are trying to launch. Malware will disable programs from running because the software to remove the malware is a program that needs to be running to quarantine and remove the malware. As a side effect of that, the malware may disable any and all programs from running.
If these problems persist, then take it to a professional such as Genius CPR computer repair near you as soon as possible for a virus and malware scan and removal. Other reasons why the programs are not working could be hard drive failure, bad memory, or a corrupt operating system. The most common of these other reasons is hard drive failure. Hard drives are not meant to last forever and after consistent usage they degrade and cause problems with reading and writing data. When this happens, the programs freeze up because they are stuck trying to read from or write to bad sectors on the hard drive. At Genius CPR, we do hard drive replacement or solid-state drive upgrades for all computer repairs because we want to keep your computer running optimally.
Getting Hot, Overheating
Overheating is usually caused by hardware components that are failing in some way. The most common cause for overheating is that the fans or cooling system is no longer effective. Sometimes, dust build-up or debris can accumulate on the fan blades or absorb oil in the fan motor causing it to spin slower or not at all. Airflow is required to keep the heat dissipating from the internal components such as the processor or graphics processing unit, memory, and hard drive. When the heat builds up on these components, they will throttle their performance to compensate.
Most users will notice slowness, crashes, and freezing as these overheated components try to recover and cool down. Depending on how long the computer is overheating, the computer repair can change drastically from a simple cleaning to complete replacement of the internal components. Overheating should be addressed as soon as possible to prevent further damages to the computer system. You can try a can of duster to clear the ventilation and sometimes that will fix the problem. Ultimately, fans are cheaper to replace than the processor, memory, or graphics card. Genius CPR can handle all computer repairs making it the one-stop shop for all your computer needs.
No Video, Blank Screen
Blank screens can be caused by quite a few things. The first thing to rule out is software-related issues such as a driver or other video-related software. Video software needs to run in an operating system to cause the issues and all computers boot to a basic input output system with low-resolution universal default graphics packages. Start by turning the computer off or unplugging the power. Press the power button several times with the power unplugged to remove all power from the system before plugging the power back in. If the computer is boot-capable then this will show the boot-up process, motherboard manufacturer logo, and give some idea of the graphics functionality.
If the computer still shows no video on start-up, the next steps will be manipulation of the internal components. We would start with RAM memory because it can be faulty more often than the graphics unit. You may want to seek a professional such as Genius CPR at this point if unfamiliar with computer hardware. Remove all RAM memory from the computer and use one stick to test each memory slot to see if there is a change in the booting procedure that produces any video. Repeat with additional sticks, continuing to use one stick at a time.
Each time you put a stick in a slot make sure the computer is turned off, preferably unplugged with all power expelled from the system pressing the power button several times while unplugged, and then removing the RAM memory stick and moving it to another slot before plugging it in and turning it back on. If this still does not resolve the issue, then it’s time to try a new dedicated graphics card. These can be expensive, so it may be best to take it to a professional computer repair shop such as Genius CPR to test the computer fully before investing in a new video card.
Lost Wi-Fi, No Internet Connection
When you lose access to the internet it can be super frustrating because everything is online these days. Whether it is a desktop computer, laptop computer, or tablet pc, the Wi-Fi connection and hardware is generally the same. There is a Wi-Fi chip inside that receives the 2.4 or 5 GHz signals within the vicinity of the device itself. If it is not seeing any networks and you are certain there are networks in the area, then the first steps are to turn the device completely off and back on again.
This will resolve most of the basic and common errors that could be causing issues with the Wi-Fi connection in the computer, laptop, or tablet. Should issues persist, you may want to look for a toggle switch on the device that turns the Wi-Fi off or on depending on the state of the toggle switch. Also check for Airplane Mode, turning this off may help solve the issue as well. The toggle switch can be quite hidden on the side, front, or back of the device or it would also exist as a software-based toggle switch in the Wi-Fi settings. If the Wi-Fi sees networks, is connected to a network, but still has no internet then it is important to know if the connection is being made at least partially. To a professional technician such as the certified and trained technicians at Genius CPR, this can be a clue in the diagnostic process. With the basic troubleshooting out of the way, it is time to look deeper into the device and it can still be software or hardware-related.
To eliminate software as a possibility, restoring the computer, laptop, or tablet to factory settings may be an option. Beware, however, that doing so will cause the loss of all data on the device such as pictures, contacts, or downloaded applications and files. If the problem persists beyond all of these steps, then it is likely a faulty Wi-Fi network interface card inside the device. With computers and laptops these are affordably replaced by a professional computer technician and in tablets and mobile devices, sometimes they cannot be replaced as easily. Often for mobile devices it may be time to upgrade to a new device, but always bring it in to a technician for a diagnosis prior to pitching it because it could still be something simple.
Brightness Not Working or a Dim Screen
If the screen has gone out then usually you will see nothing, but if the screen is dim it could mean something else entirely. Screen brightness can be controlled in multiple places depending on the device. For laptops it is controlled in the operating system and in most cases there is a screen brightness button in the function keys at the top of the keyboard. For that top row of function keys on the keyboard to work you may need to press the “Fn” key in conjunction with the function key to increase the brightness.
It is also possible that the software updated or the software to control the brightness is out-of-date or no longer working. Reinstalling the software would then remedy that situation and can be downloaded from the computer or laptop manufacturer’s website. For a desktop computer, the monitor is a separate hardware piece altogether and the brightness is controlled by the monitor’s built-in settings using the buttons on the monitor itself. For tablets and tablet computers, the brightness is controlled in the settings and often there is no easy way to navigate to the settings for brightness. Shine a flashlight on the screen to brighten it up enough to navigate to those settings. If all else fails it is possible that the backlight has died in the screen. The backlight shines through the back of the screen and is adjusted by those function keys or software to give you the brightness settings. At this point, it is time to take the computer, laptop, or tablet computer into a professional repair shop such as Genius CPR where certified and trained technicians can replace faulty computer components.
Computers and laptops are everywhere, with lots of new features and advancements. Choosing a computer or laptop to meet your needs is daunting, as many options and brands are available. Based on your needs or the type of usage, different technical specifications are available, and one must know which one to go for. For people with technical knowledge, it is easy to choose, and for others, our technical guide comes to your rescue by providing all the required information. Not just to guide you about technicalities, even for fixing some minor computer or laptop repairs, the technical guide can be very helpful in fixing things yourself. This way, you can save time & money on computer repairs. However, if the problems persist, if there are other issues like your computer battery repairs or laptop repairs, and laptop screen replacements, then your nearest Genius CPR professionals are always there to fix and repair the computers or laptops. MacBook repairs are also undertaken, and you can enjoy a hassle-free repair experience at Genius CPR stores.
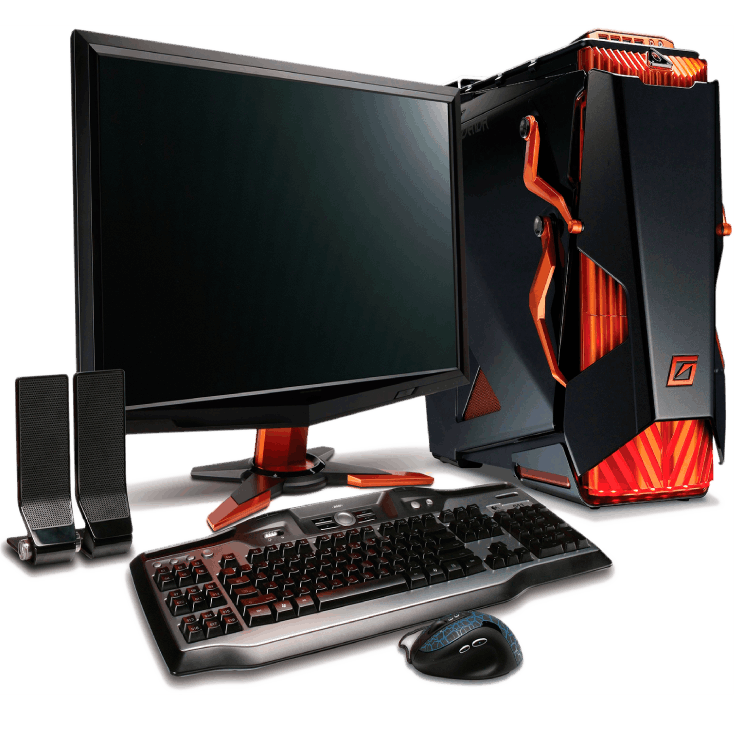
Computers and laptops are everywhere, with lots of new features and advancements. Choosing a computer or laptop to meet your needs is daunting, as many options and brands are available. Based on your needs or the type of usage, different technical specifications are available, and one must know which one to go for. For people with technical knowledge, it is easy to choose, and for others, our technical guide comes to your rescue by providing all the required information. Not just to guide you about technicalities, even for fixing some computer service and repairs, the technical guide can be very helpful in fixing things yourself. This way, you can save time & money on computer repairs. However, if the problems persist, if there are other issues like your computer battery repairs or laptop repairs, and laptop screen replacements, then your nearest Genius CPR professionals are always there to fix and repair the computers or laptops. Gaming PC repairs are also undertaken, and you can enjoy a hassle-free repair experience at Genius CPR stores.
These days the technological features on your computers, laptops, and MacBooks are very user-friendly and self-explanatory. If any issue arises, you can troubleshoot most of the issues by following a few simple steps. Laptop screen replacements, computer battery replacements, or other MacBook repairs require professional or technical help. In such cases, you can always visit your nearest Genius CPR store for all types of computer repairs and laptop repairs.
These days the technological features on your computers, laptops, MacBooks, etc., are very user-friendly and self-explanatory. If any issue arises, you can troubleshoot most of the issues by following a few simple steps, unless it’s a laptop screen replacement, computer battery replacement, MacBook repairs, etc., where you require professional or technical help. In such cases, you can always visit your nearest Genius CPR store for all types of computer repairs and laptop repairs.
Iphone Screen Repair
Repairs Using Quality Parts
Device Sanitation
Most Common Issues
More Info
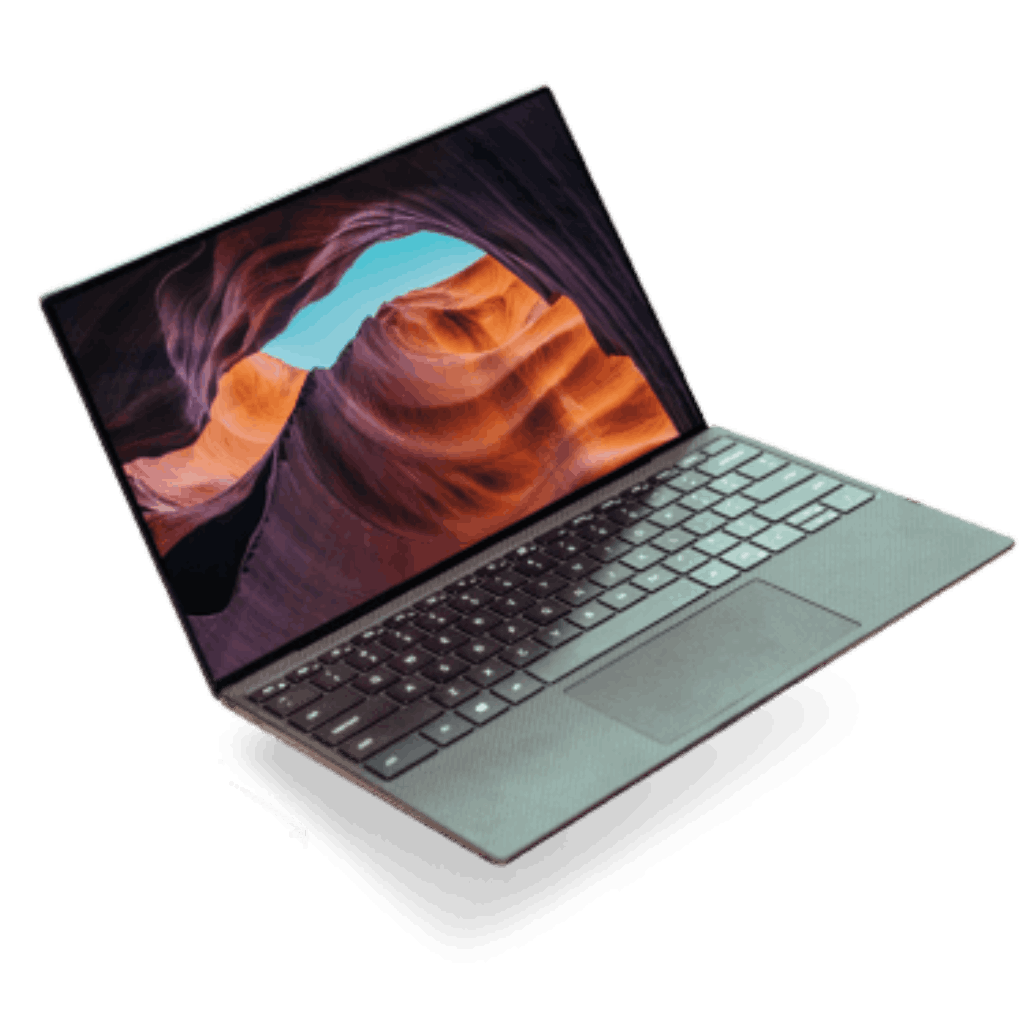
With portability comes batteries, rechargeable batteries in laptops, which degrade over time. While a long-lasting battery ensures smooth flow of work and performs like a pro, an unreliable or poor battery can underperform, thus significantly limiting your workflow. Not all batteries are created equal. Some batteries can last up to 13 hours while others last for four hours when away from a charger. In any event, if there is any issue with the battery, it is advisable to look for a laptop repair nearby such as Genius CPR and get them fixed without delay.
Our Locations
Phone: (616) 855-1070
Phone: (616) 855-1070
Phone: (231) 766-7154
Phone: (260) 408-1101
Phone: (260) 243-5172
Phone: (574) 855-3770


